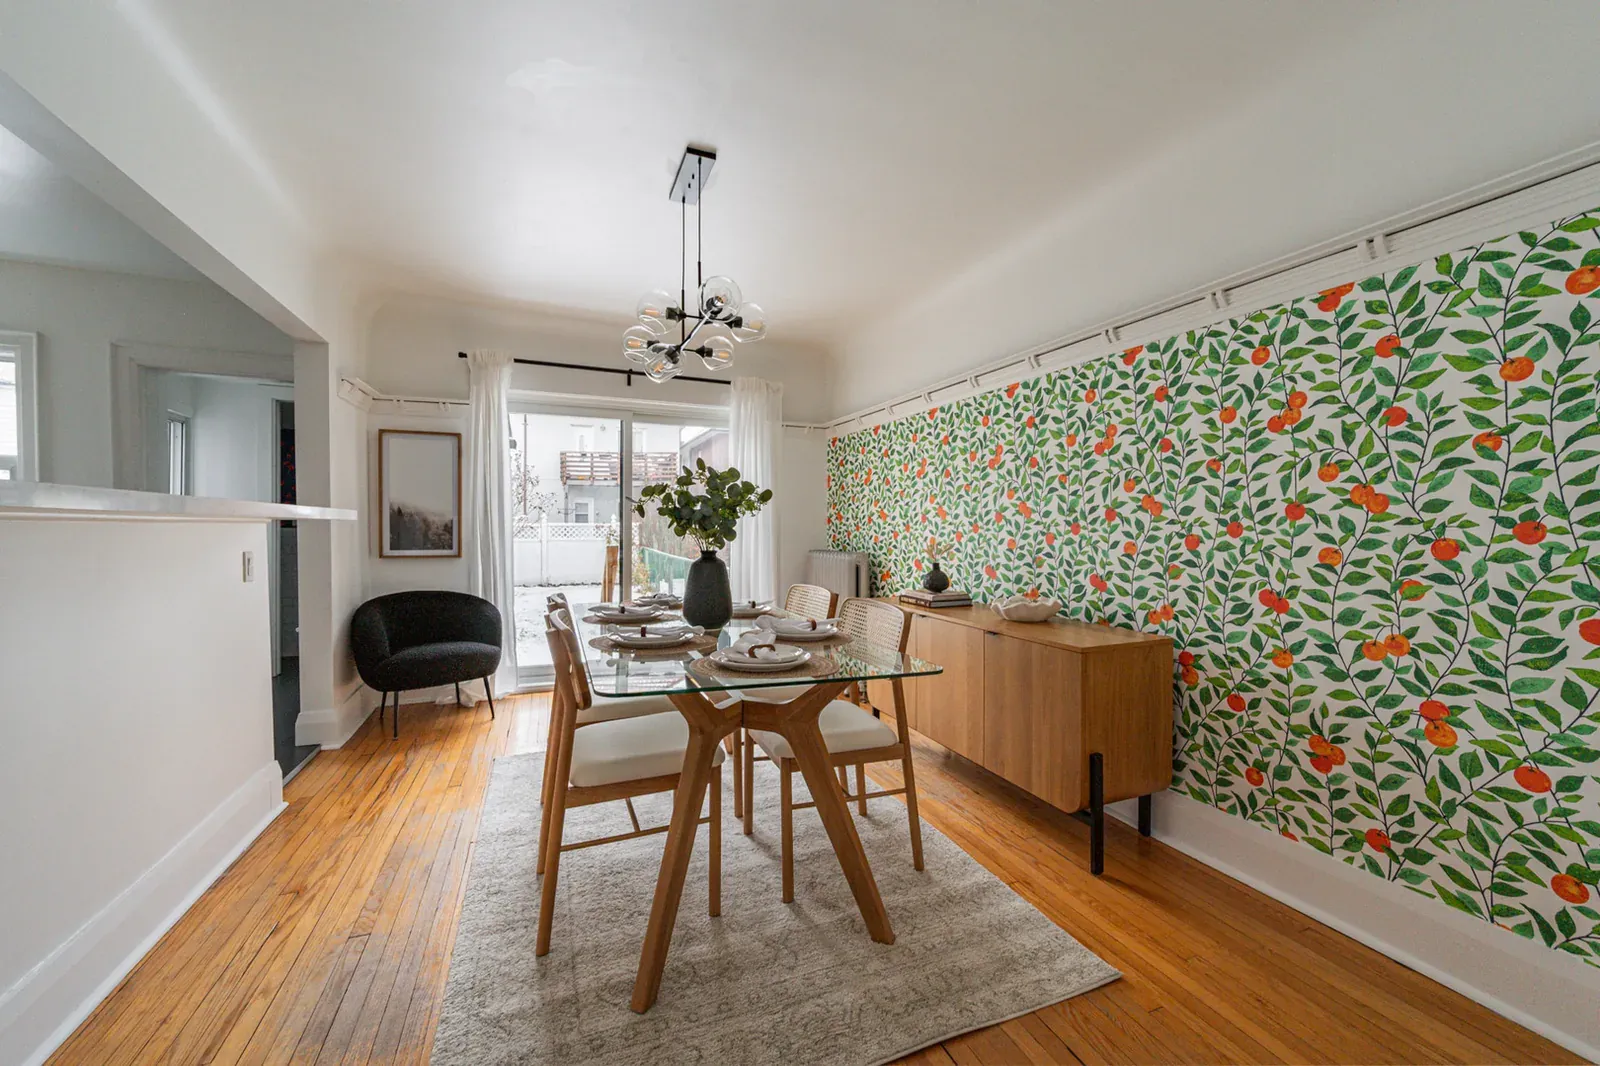
A dark home can feel brighter and more inviting when staging improves daylight, artificial illumination, colour balance, furniture placement, and visual clarity. Start by identifying what blocks or absorbs light in each room. Then clean the windows, open sightlines, reduce heavy furnishings, layer suitable lamps, and introduce carefully positioned reflective surfaces. These cosmetic measures cannot change the property’s orientation or window dimensions, but they can present the available light more effectively while preserving warmth, function, safety, and an honest representation of the home.
Why Does the Home Appear Dark?
Darkness can result from several overlapping conditions rather than one obvious problem. Assessing each cause separately helps prevent unnecessary purchases and directs attention towards changes that can produce a visible improvement.
Examine Window Size, Position, and Orientation
Window dimensions affect how much daylight enters, while orientation influences when that light appears. A room may receive direct morning light, softer afternoon light, or very little direct sun. Seasonal changes also alter the angle, duration, and strength of daylight.
Observe every room at several times during the day. Record when the space looks brightest and which surfaces receive light. This assessment can inform viewing schedules, furniture placement, paint choices, and photography preparation. However, avoid judging colour or brightness from one sunny afternoon because cloudy weather may reveal different conditions.
Identify External Barriers
Neighbouring buildings, roof overhangs, mature trees, balconies, fences, and deep exterior recesses can limit daylight before it reaches a window. Some barriers remain outside the resident’s control, especially in condominiums, attached homes, and rental properties.
Where permission allows, trim vegetation that presses against windows or blocks a substantial amount of light. Preserve healthy landscaping, privacy, building rules, and municipal requirements. Permanent exterior alterations may require approval. When an obstruction cannot change, improve the interior by distributing available light and reducing dark contrasts.
Inspect Interior Obstructions
Tall bookcases, wardrobes, plants, room dividers, and high-backed furniture can interrupt incoming daylight. Even decorative objects on a windowsill may cast shadows or reduce the visible glazed area.
Stand at each entrance and look towards the window. If a large object dominates that sightline, move it to an interior wall where possible. Furthermore, leave enough space for curtains and blinds to open fully. Furniture must never obstruct windows required for ventilation, emergency escape, or safe access.
Review Light-Absorbing Surfaces
Dark walls, matte flooring, deep cabinetry, heavy upholstery, and layered textiles absorb or visually contain light. One dark element may provide useful depth, but several large dark surfaces can make a room feel enclosed.
List the room’s dominant colours and finishes. Determine which items can move, which can receive a cosmetic update, and which must remain. Rather than replacing everything, balance permanent dark features with lighter textiles, open floor area, brighter walls, and evenly distributed illumination.
How Should Darkness Be Assessed Room by Room?
A consistent inspection separates lighting problems from clutter, maintenance, or layout issues. Complete the assessment before changing the décor so each decision responds to an identified weakness.
Use a Daylight and Evening Review
Inspect the property during daylight, at dusk, and after dark. During each review, note dark corners, harsh shadows, glare, inconsistent bulb colours, and rooms that depend entirely on one ceiling fixture.
A simple checklist should cover:
- The brightest and darkest viewing times
- Windows blocked by furnishings or vegetation
- Fixtures with weak or failed bulbs
- Corners that disappear into shadow
- Work surfaces without task lighting
- Reflective surfaces that create glare
- Doorways connecting rooms with different light colours
- Hallways without a clear source of illumination
Photographing the same position under different conditions can reveal changes that casual observation misses.
Separate Cosmetic Issues from Building Conditions
Staging can improve presentation, but it cannot correct every cause of darkness. Small windows, deep floor plans, low ceilings, limited electrical provision, and fixed architectural features may require renovation if an owner seeks permanent alteration.
Do not conceal moisture damage, faulty wiring, damaged fixtures, or other material concerns behind furniture or decorative lighting. Electrical, structural, and safety-sensitive work requires appropriate permission and qualified attention. Cosmetic preparation should clarify the property’s condition rather than create a misleading impression.
How Can Available Daylight Be Maximized?
Daylight provides natural variation and makes colours appear more balanced. Simple cleaning, window-treatment adjustments, and furniture changes can help more light enter and travel across the room.
Clean Every Part of the Window
Dust, fingerprints, residue, and dirty screens reduce clarity and make windows appear neglected. Clean the glazing inside and outside where safe access permits. Moreover, wipe frames, tracks, sills, handles, and glass doors.
Repair damaged screens or blinds when the occupant has authority to do so. Never reach from an unsafe height or lean beyond a window opening. In apartments and condominiums, exterior window cleaning may fall under building-management procedures. Clean glass also improves the quality of property photographs by reducing haze and visible marks.
Open Window Treatments Completely
Pull curtains beyond the glass and raise blinds to reveal the full opening where privacy allows. Curtain rods that extend beyond the window frame can provide space for panels to stack beside, rather than across, the glazing.
Check whether curtain headings, valances, or decorative layers cover the upper portion of the window. Removing an unnecessary layer may admit more daylight. However, retain coverings required for privacy, insulation, glare control, or household comfort. The objective is controlled brightness, not complete exposure.
Select Light-Filtering Materials
Sheer or light-filtering curtains can soften direct light while maintaining daytime privacy. Pale fabrics generally appear less visually heavy than dark, densely patterned alternatives.
Window treatments should suit the room’s exposure and use. A street-facing bedroom may require more privacy than an upper-floor living room, while a west-facing room may need protection from intense afternoon glare. Where permanent replacement is unsuitable, temporarily simplifying layered treatments can improve clarity without altering fittings.
Clear Windowsills and Nearby Surfaces
Numerous plants, ornaments, photographs, and storage containers interrupt the window’s clean outline. Retain only a limited number of items that do not materially block light.
Position large plants beside, rather than directly in front of, the glazing when their growing needs permit. Similarly, move tall lamps and furniture away from the opening. An unobstructed view can increase visual depth, particularly when the outlook includes trees, sky, architecture, or a maintained outdoor area.
How Should Artificial Lighting Be Planned?
Artificial lighting works best as a coordinated system. Combining ambient, task, and accent light creates more even coverage than relying on one extremely bright fixture.
Establish Ambient Lighting
Ambient lighting provides general illumination throughout a room. Ceiling fixtures, pendants, recessed lights, and suitable wall-mounted fittings may serve this purpose, depending on the existing installation.
Replace failed or noticeably weak bulbs with compatible alternatives that meet the fixture’s specifications. Do not exceed permitted wattage or cover vents around a light. If a fixture flickers, overheats, or appears damaged, stop using it until it receives appropriate inspection. Safety must remain more important than presentation.
Add Task Lighting Where Activities Occur
Task lighting directs light towards reading chairs, desks, kitchen counters, bedside areas, and other working surfaces. It reduces the need to over-brighten an entire room.
Use table lamps or floor lamps where outlets and safe cable routes permit. Under-cabinet lights can brighten kitchen counters, although permanent installation may require authorization. Position each source to illuminate the task without shining directly into a seated person’s eyes or creating a severe reflection on screens and glossy surfaces.
Use Accent Lighting to Reveal Depth
Accent lighting draws attention to vertical surfaces, artwork, shelving, or architectural details. It can also prevent corners from disappearing into shadow.
A lamp near the rear of a room encourages the eye to travel farther, which may strengthen the impression of depth. Nevertheless, avoid placing numerous small lamps around every perimeter. Too many fixtures create clutter, exposed cords, and scattered points of brightness. Each light should solve a specific problem.
Coordinate Brightness and Colour Temperature
Connected rooms usually appear more coherent when bulbs produce compatible light colours. Mixing cool blue-white light with strongly yellow light can create an uneven, unsettled presentation.
Select bulb output according to room size, surface colours, shade design, and fixture purpose rather than relying on one specification for the entire home. Warm or neutral light often supports a comfortable residential atmosphere. However, test bulbs after sunset because packaging descriptions cannot show how existing finishes will respond.
Prevent Glare and Harsh Shadows
An exposed bulb, highly polished surface, or strong spotlight may cause discomfort and produce distracting photographs. Shades, diffusers, and indirect placement can soften the light.
Check the room from standing and seated positions. A source that appears comfortable near the doorway may glare from the sofa. Similarly, overhead lighting can cast shadows beneath cabinets or around facial features. Layering lower-level lamps with ceiling illumination usually produces a more balanced effect.
Which Colours Help Dark Rooms Feel Brighter?
Colour affects how a room reflects light and how warm or cool that light appears. Pale finishes can support brightness, but thoughtful undertones and continuity matter more than choosing the whitest available paint.
Choose Whites and Neutrals by Undertone
Warm white, soft cream, pale greige, muted beige, and restrained light colours can brighten a room while maintaining warmth. However, a shade that looks balanced in one property may appear grey, yellow, pink, or green elsewhere.
Apply samples to more than one wall and examine them during the expected viewing hours. Compare the colour under daylight and every artificial-lighting layer. Moreover, assess it beside fixed flooring, cabinetry, countertops, and trim, since nearby finishes can intensify an undertone.
Use Reflective Finishes Carefully
Paint with a modest sheen can reflect more light than a completely flat surface. Nevertheless, higher sheen also highlights wall imperfections and may create glare.
Choose finishes according to the surface, room use, and manufacturer’s intended application. Ceilings often benefit from a consistent, clean appearance, while trim and doors may tolerate a slightly more reflective finish. Always address dampness, cracking, or damaged substrates appropriately rather than covering them solely for presentation.
Coordinate Walls, Ceilings, and Trim
Strong contrast between a dark wall, bright ceiling, and unrelated trim can visually divide a compact interior. A coordinated palette usually creates a smoother transition between surfaces.
Repainting a dark feature wall may help when it absorbs much of the room’s limited light. However, keeping one deeper accent can provide dimension if the remaining palette feels balanced. Decorative preference remains subjective, so judge the effect within the actual layout rather than following an inflexible rule.
Connect Adjoining Rooms
Visible rooms should relate to one another, particularly in open-plan homes or layouts with wide doorways. Repeating compatible neutrals, timber tones, and restrained accents helps create continuity.
Seasonal conditions can also affect colour decisions. For example, home staging in Toronto often needs to account for shorter winter daylight, snow-reflected brightness, cloudy periods, and condominium units shaded by neighbouring towers. Testing finishes under realistic conditions prevents a pale colour from appearing unexpectedly cold.
How Can Furniture Placement Improve Brightness?
Furniture determines whether light can travel through a room and whether occupants can see its full dimensions. Editing and repositioning major pieces often produces a greater effect than adding decorative lighting.
Move Tall Pieces Away from Windows
Bookcases, wardrobes, screens, and high-backed seating can block incoming light or cast broad shadows. Move tall items to interior walls where they remain functional without narrowing the glazed opening.
Keep heating units, vents, electrical panels, doors, and circulation routes clear. Additionally, secure tall furniture to reduce tipping risks, especially around children and pets. If relocation creates an awkward arrangement, removal may work better than forcing the piece into another unsuitable position.
Reduce Oversized or Unnecessary Furniture
A room filled with large, dark furniture leaves little visible floor or wall area. Remove pieces that duplicate a function, restrict movement, or dominate the available dimensions.
Retain enough furniture to communicate how the room works. An almost empty space may feel cold and can make scale difficult to judge. One proportionate sofa, a compact table, and a carefully placed chair may create more balance than several small pieces scattered around the perimeter.
Choose Lighter Visual Weight
Furniture raised on visible legs allows light and flooring to remain visible beneath it. Slim profiles, open frames, restrained upholstery, and glass elements can also reduce visual heaviness.
Physical stability still matters. Glass tables require careful placement and may not suit homes with active children or pets. Similarly, open furniture should not create sharp projections in walking routes. Select each piece according to the household’s safety and functional needs.
Preserve Sightlines and Movement
Stand at the entrance and identify the room’s brightest feature. Arrange furniture so the eye can travel towards that point without meeting a tall or bulky obstruction.
Create clear paths between doors, seating, windows, and adjoining rooms. Avoid angling large pieces unless the room comfortably supports the additional floor area they consume. Straightforward alignments often produce cleaner sightlines and reduce deep triangular shadows behind furniture.
How Should Textiles and Accessories Be Edited?
Textiles bring warmth, but dark, thick, or heavily patterned materials can absorb light. Accessories should support the room’s focal points instead of competing with them.
Lighten Heavy Textile Layers
Replace or temporarily remove bulky throws, dark slipcovers, excessive cushions, and thick layered rugs where appropriate. Choose a limited mixture of lighter colours and tactile materials to retain comfort.
A pale rug may brighten dark flooring, provided its dimensions relate properly to the furniture group. An undersized rug can fragment the floor and emphasize limited space. In dining areas, ensure chairs remain stable when pulled back and that rug edges do not create a tripping hazard.
Control Decorative Clutter
Crowded shelves and surfaces create small shadows while increasing visual activity. Edit accessories so each arrangement includes some clear space.
Group compatible objects rather than distributing them evenly across every surface. A simple arrangement might include:
- One substantial piece of artwork
- A restrained group of books
- A healthy plant suited to the available light
- Two or three related decorative objects
- A pale textile that connects existing colours
Keep personal records, medicines, valuables, and sensitive photographs securely out of view.
How Can Mirrors and Reflective Surfaces Redirect Light?
Reflective elements can distribute available light and introduce visual depth. Their effectiveness depends on position, scale, cleanliness, and the quality of the reflected view.
Position Mirrors Opposite Useful Light
A mirror placed opposite or beside a window may redirect brightness deeper into a room. Before installing it, check the reflection from the entrance and common viewing positions.
Reflecting an attractive outlook, artwork, or orderly seating area can strengthen the room’s presentation. In contrast, a mirror that duplicates clutter, a blank corridor, or an exposed utility area may increase visual confusion. Move temporary objects before judging the final effect.
Choose an Appropriate Scale
A very small mirror may function as decoration without materially influencing brightness. A larger piece can reflect more of the room, although it should remain proportionate to the wall and nearby furniture.
Use installation hardware suited to the mirror’s weight and wall construction. Secure leaning mirrors to prevent tipping, particularly where children, pets, or visitors could make contact. Renters and condominium residents should confirm applicable restrictions before drilling or changing permanent fittings.
Add Subtle Reflective Details
Polished taps, glass-fronted cabinets, restrained metallic accents, and glossy ceramics can contribute small points of reflected light. Clean these surfaces carefully before viewings and photography.
Avoid covering every surface with shine. Excessive reflection can produce glare, fingerprints, confusing images, and an impersonal atmosphere. Combine reflective materials with soft textiles, timber, and matte finishes so the home retains visual warmth.
How Should Dark Entrances and Hallways Be Staged?
Entrances and hallways establish the transition into the home. Because these areas often lack windows, controlled lighting and minimal clutter become especially important.
Create a Bright, Orderly Arrival
Use the strongest safe ambient lighting already available and add a suitable lamp only when space and cable access permit. Remove excess coats, shoes, bags, parcels, and seasonal equipment.
A mirror can increase depth if it reflects an orderly area rather than the door’s hardware or a crowded rack. Keep the entrance mat proportionate and clean. Furthermore, ensure that the main door opens fully and that no object interferes with the exit route.
Lead the Eye Through the Hallway
Illuminate the far end of a corridor with a lamp, artwork light, or existing fixture where appropriate. This draws attention through the passage instead of allowing it to fade into darkness.
Use a restrained sequence of artwork and avoid projecting furniture in narrow routes. Open adjoining doors strategically when the rooms beyond appear bright and orderly. However, close doors that reveal storage clutter or create competing visual information.
How Can a Dark Living Room Feel More Inviting?
The living room should combine functional seating with balanced illumination. Dark upholstery can remain, but lighter surrounding elements should prevent it from dominating the room.
Build Lighting Around the Seating Area
Combine general overhead illumination with a floor or table lamp near the main seating. Then brighten a distant corner or wall to create depth.
Avoid placing every lamp at the same height. Variation produces a more natural residential atmosphere and reduces flatness. Position shades so bulbs do not glare into visitors’ eyes. Conceal cables along safe routes without placing them under unstable coverings or across walkways.
Balance Dark Furniture
A dark sofa can remain if its size suits the room and it does not block a window. Add a restrained selection of pale cushions, a lighter throw, or a rug that connects the seating arrangement.
Keep surrounding surfaces relatively clear. Rather than adding numerous shiny accessories, use one mirror or glass table where it provides a practical benefit. A few warm materials can prevent the brighter palette from feeling clinical.
How Should Dining Areas and Kitchens Be Brightened?
Food-preparation and dining spaces need clear working light as well as comfortable ambient illumination. Clean surfaces and controlled reflections can improve both function and presentation.
Illuminate Dining Surfaces Evenly
A pendant or ceiling fixture should illuminate the table without producing a harsh pool of light. Supplement it with nearby ambient lighting if the surrounding corners remain dark.
Choose a table size that allows comfortable circulation. Remove surplus chairs instead of lining them along walls. Use a simple centrepiece that does not obstruct views or absorb much light. Pale place settings may add contrast, although excessive styling can make the surface appear crowded.
Reveal Kitchen Work Areas
Clear counters of infrequently used appliances, surplus containers, paperwork, and decorative collections. Then clean cabinet fronts, backsplash surfaces, taps, and windows.
Existing under-cabinet lighting can reduce shadows on countertops. Replace failed compatible bulbs, but leave new wiring or permanent electrical changes to suitably qualified attention. Never block outlets, vents, cooktops, safety devices, or appliance clearances with staging objects.
Balance Dark Cabinetry
Dark cabinets may look deliberate when walls, counters, flooring, and lighting provide sufficient contrast. Avoid trying to conceal them with excessive countertop accessories.
If permitted, updating removable textiles, hardware, or wall colour can create a lighter balance. However, permanent painting requires careful preparation and may conflict with tenancy or condominium conditions. Clean cabinetry thoroughly first, since residue can make dark finishes appear duller.
How Can Bedrooms and Bathrooms Feel Brighter?
Private rooms should appear calm, clean, and functional. Simple bedding, clear surfaces, and flattering illumination usually work better than elaborate decoration.
Simplify Bedroom Textiles
Choose bedding that fits the mattress properly and presents a controlled colour palette. Light or medium tones can offset dark flooring or furniture, while modest texture retains warmth.
Reduce decorative pillows and remove clothing from chairs, door handles, and visible storage. Position bedside lamps symmetrically only when the layout supports two tables. Otherwise, one well-scaled lamp may look more natural than forcing a crowded arrangement.
Improve Bathroom Reflections
Clean mirrors, glass, fixtures, grout, and glossy surfaces because water marks become conspicuous under bright lighting. Clear personal toiletries from counters and shower ledges.
Ensure vanity lighting illuminates faces evenly without severe overhead shadows. A light-coloured shower curtain and coordinated towels may brighten the room without permanent alteration. Keep ventilation openings clear, and store medicines, cleaning products, and sharp items securely.
How Should Basements and Windowless Rooms Be Presented?
Basements and internal rooms need deliberate artificial lighting because daylight may remain weak or absent. Honest staging should emphasize function without pretending that natural light exists.
Layer Light Across the Basement
Illuminate the ceiling, activity areas, stairs, corners, and vertical surfaces. One intense fixture can make surrounding areas look darker by comparison.
Use pale textiles and furniture with moderate visual weight, but retain enough warmth to avoid an institutional appearance. Keep window wells clean and unobstructed where they exist. Never cover access panels, heating equipment, sump systems, detectors, or emergency exits.
Define Windowless Rooms Clearly
Assign a credible residential purpose that suits legal, building, and safety requirements. A hobby room, storage area, or flexible household zone may require different staging from a bedroom.
Use consistent artificial light and a limited palette. A mirror may create depth, but placing curtains on a blank wall could misrepresent the room. Presentation should clarify the space rather than imply architectural features that do not exist.
How Can Balconies and Open-Plan Areas Be Managed?
Shaded balconies and connected interiors affect how daylight enters and moves. Their staging should protect views, circulation, and visual continuity.
Keep Shaded Balconies Clear
Remove bulky storage, dead plants, dirty containers, and furniture that blocks the glass doors. Clean the glazing and arrange one proportionate outdoor seating area if space permits.
Follow building rules concerning planters, floor coverings, lighting, and railing clearance. Secure lightweight objects against wind. Even when the balcony receives little sun, an orderly outlook can create depth from inside the residence.
Coordinate Open-Plan Lighting
Use compatible bulb colours across living, dining, and kitchen zones. Each area may have distinct task lighting, but the overall composition should remain visually connected.
Repeat selected colours and finishes instead of assigning a separate palette to every function. Moreover, position tall storage away from shared sightlines. Clear transitions allow light from several windows or fixtures to contribute to the full space.
How Should the Home Be Prepared for Viewings?
Viewing preparation should respond to the expected weather, season, and time. A setting that works at noon may require adjustment for a winter afternoon or evening appointment.
Test Conditions at the Expected Time
Inspect the home at the scheduled viewing hour whenever possible. Note whether daylight reaches key rooms and which artificial lights become necessary.
Before visitors arrive:
- Open suitable curtains and blinds fully.
- Turn on coordinated ambient and task lighting.
- Check every bulb for consistent operation.
- Remove temporary clutter and cleaning supplies.
- Open selected internal doors to extend sightlines.
- Wipe windows, mirrors, and polished surfaces.
- Confirm comfortable temperature and ventilation.
- Keep exits and walking routes completely clear.
Cloudy weather may require additional lamps, while bright sun may require filtered coverings to control glare.
How Should Dark Interiors Be Photographed Honestly?
Property photographs should reveal layout and condition without exaggerating brightness. Careful preparation can improve clarity while preserving an accurate representation.
Balance Windows and Interior Light
Clean windows, turn on appropriate fixtures, and photograph when daylight provides the most balanced result. Avoid an angle that turns the window into a featureless bright rectangle while leaving the room in shadow.
Check mirrors and glossy surfaces for reflections of equipment, open storage, cables, or unrelated rooms. A modest foreground element may create depth, but it should not block useful features or make the room look artificially large.
Avoid Excessive Image Editing
Reasonable adjustments can correct colour or exposure, but heavy alteration may misrepresent finishes, views, shadows, or window brightness. Maintain consistency across photographs of connected rooms.
Do not digitally remove permanent defects, change wall colours, insert artificial windows, or replace an unattractive outlook. Accurate images help viewers assess whether the property suits their needs. Staging should organize the real environment, not create a fictional one.
Which Affordable Changes Offer Practical Value?
Cost-conscious preparation should address cleanliness, failed lighting, clutter, and poor furniture placement before adding new decorative objects.
Follow a Sensible Priority Order
Begin with tasks that improve several rooms at once. Cleaning supplies, functional bulbs, furniture editing, and coordinated textiles may have broader value than isolated decorative purchases.
A practical order includes:
- Cleaning glazing and reflective surfaces
- Replacing compatible failed bulbs
- Opening and simplifying window treatments
- Removing unnecessary furniture
- Rearranging lamps already in the home
- Refreshing worn, removable textiles
- Touching up permitted cosmetic damage
- Adding accessories only where balance requires them
Obtain appropriate permission before painting, drilling, changing fixtures, or altering shared property.
Which Common Mistakes Should Be Avoided?
Overcorrection can make a dark home feel glaring, cold, or artificial. Balanced light and controlled contrast usually produce a more comfortable result.
Avoid Lighting and Styling Errors
A single powerful ceiling bulb creates harsh shadows rather than even illumination. Similarly, conflicting bulb colours disrupt continuity between connected rooms.
Other frequent mistakes include:
- Choosing cold white paint without testing undertones
- Blocking windows with furniture or tall plants
- Leaving heavy curtains partly closed
- Using mirrors that reflect clutter
- Covering many surfaces with glossy materials
- Removing so much furniture that rooms feel vacant
- Ignoring hallways and connecting areas
- Exposing unsafe lamp cables
- Concealing defects with furniture
- Altering electrical fittings without proper authority
Correct these issues through observation, editing, and safe adjustment.
What Should the Final Inspection Cover?
The final inspection should evaluate brightness, accuracy, safety, and comfort across the full viewing route. Complete it from both a visitor’s perspective and likely camera positions.
Conduct a Consistent Room-by-Room Check
Begin outside the entrance, then walk naturally through every residential area. Pause at doorways and examine corners, ceilings, windows, and reflective surfaces.
Confirm that:
- All intended lights operate correctly
- Connected rooms have compatible light colour
- Curtains open without obstruction
- Windows and mirrors appear clean
- Furniture preserves safe walking routes
- Dark corners receive appropriate illumination
- Cables remain concealed and secure
- Doors, vents, controls, and panels remain accessible
- Each room communicates a clear purpose
- Photographs represent actual conditions accurately
Finally, remove tools, spare bulbs, packaging, and cleaning equipment from view.
Conclusion
A dark home can appear brighter when staging makes better use of daylight, layered lighting, coordinated colour, clear sightlines, and selective reflection. Cleaning windows, editing heavy furnishings, illuminating corners, and controlling visual clutter often improve warmth and clarity without structural work. However, orientation, season, weather, layout, safety, budget, and property restrictions should shape every decision. Careful testing under realistic viewing conditions helps create an inviting presentation while keeping the home’s features and limitations accurately represented.
FAQs
What paint colours make a dark home appear brighter?
Warm whites, soft creams, pale greiges, and restrained light colours can make a dark home appear brighter. Test several samples beside fixed flooring, cabinetry, and trim during daylight and after sunset. Avoid selecting a stark white solely from a colour card because surrounding finishes may reveal unwanted undertones.
Which light bulbs work best in rooms with little daylight?
Bulbs providing comfortable warm or neutral light generally suit dark residential rooms, although fixture type, room size, and surface colour affect the result. Choose compatible brightness, maintain consistent colour temperature across connected areas, and use several light sources instead of relying on one unusually powerful ceiling bulb.
Where should mirrors go in a dark room?
Place mirrors opposite or beside a useful source of daylight where they can reflect brightness into the room. Check that they show an attractive view rather than clutter or exposed utilities. Use secure wall fixings, and stabilize leaning mirrors where children, pets, or frequent movement create tipping risks.
Should all lights remain on during a property viewing?
No, turn on lights that improve visibility, balance, and safe movement rather than every available fixture automatically. Excessive illumination can create glare and an unnatural atmosphere. Test the property at the expected viewing time, then use coordinated ambient, task, and accent lighting wherever daylight remains insufficient.
How can a dark room look brighter without repainting?
A dark room can look brighter through clean windows, fully opened treatments, lighter textiles, reduced clutter, and better-positioned lamps. Move tall furniture away from glazing, clear reflective surfaces, and brighten shadowed corners. Additionally, use a well-placed mirror to redirect existing light without altering permanent finishes.
Do light-coloured curtains improve a dark interior?
Light-coloured curtains can improve a dark interior when they filter daylight without covering much of the glass. Extend the rod beyond the frame so open panels stack beside the window. Choose materials that also provide suitable privacy, insulation, glare control, and compatibility with the room’s existing palette.
How should a dark basement be staged?
Stage a dark basement with layered artificial lighting, pale coordinated textiles, clear routes, and an obvious lawful purpose for each area. Illuminate stairs, corners, and activity zones evenly. Keep window wells, heating equipment, detectors, electrical panels, drainage systems, ventilation points, and emergency exits visible and unobstructed.
Can dark furniture remain in a staged home?
Yes, dark furniture can remain when its proportions suit the room and surrounding elements provide balance. Move bulky pieces away from windows, remove unnecessary matching items, and introduce restrained lighter textiles. Visible flooring, clear wall space, raised furniture legs, and layered lighting can reduce excessive visual weight.
How can a dark home be prepared for property photographs?
Prepare a dark home by cleaning windows, opening suitable coverings, balancing daylight with interior lighting, and clearing distracting objects. Photograph rooms when natural conditions appear favourable, check mirrors for unwanted reflections, and maintain accurate colours and proportions. Avoid excessive editing that misrepresents brightness, views, finishes, or defects.
What low-cost changes can brighten a home before viewings?
Low-cost improvements include cleaning glazing, replacing compatible failed bulbs, opening heavy window treatments, moving furniture, reducing clutter, and refreshing removable textiles. Rearrange existing lamps to illuminate corners and work surfaces. Prioritize safe maintenance and cleanliness before purchasing decorative items that may add expense without solving the underlying darkness.