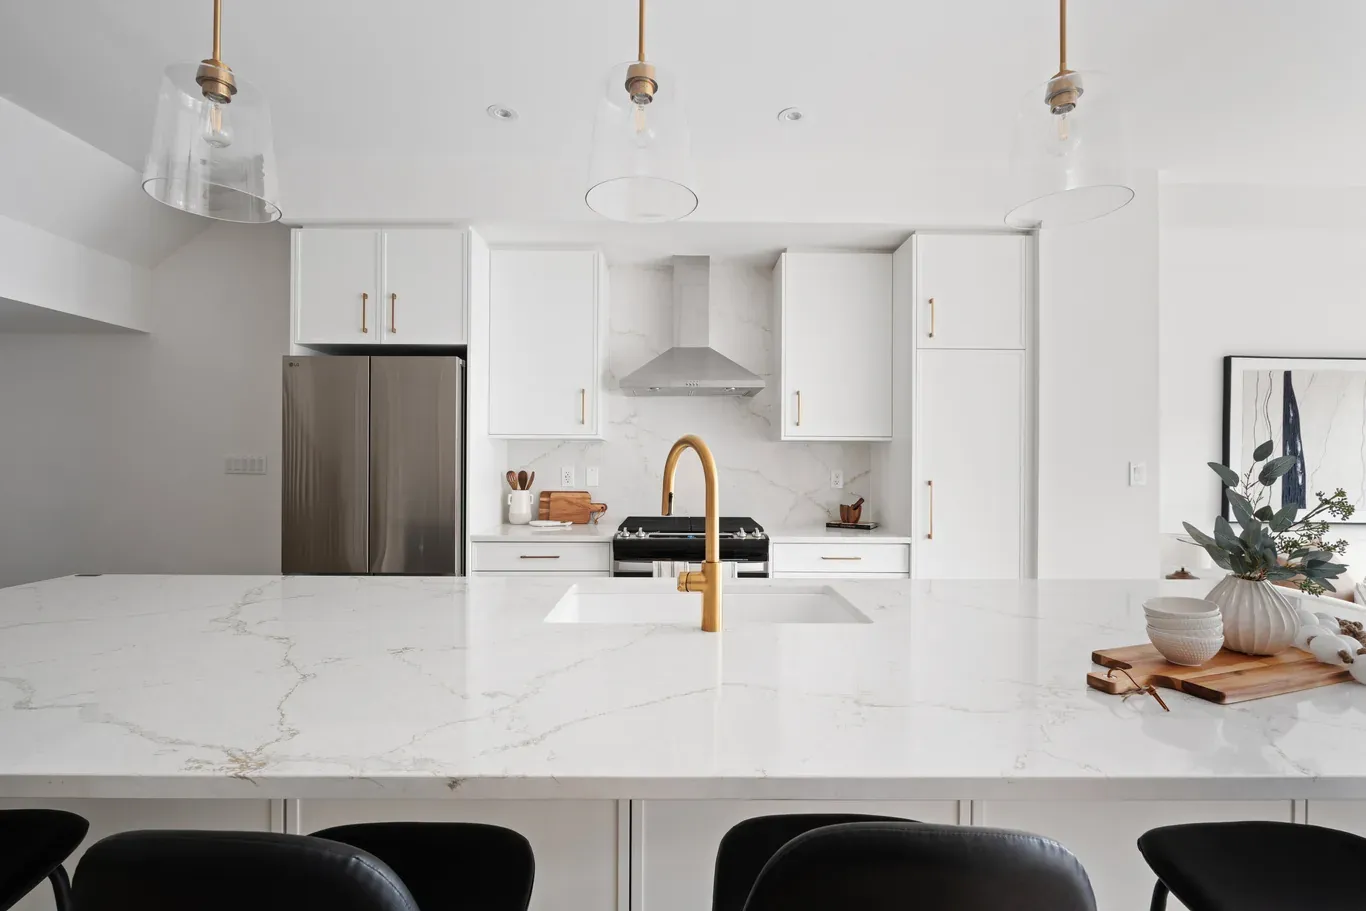
Lighting can improve a staged property by revealing room dimensions, supporting accurate colour, reducing deep shadows, and making connected spaces feel more coherent. Natural daylight shows the relationship between interiors and windows, while layered artificial light keeps rooms functional when daylight weakens. Suitable brightness, colour temperature, direction, and fixture placement can also draw attention towards genuine architectural features. However, lighting changes visual perception rather than actual size or condition. Effective preparation should remain comfortable, energy-conscious, safe, and realistic in photographs and physical viewings.
Why Does Lighting Matter in Property Presentation?
Suitable lighting helps people see the property clearly. It can improve visual comfort, reveal useful features, and create continuity without changing the residence’s physical dimensions, permanent finishes, or structural condition.
Lighting Clarifies Room Dimensions and Functions
Even illumination makes walls, corners, floors, and circulation routes easier to see. When a room contains large areas of shadow, viewers may find its boundaries difficult to interpret, particularly in photographs.
Lighting can also reinforce function. A reading lamp beside a chair indicates a quiet seating area, while illumination over a dining table defines where meals may take place. Similarly, task lighting above a kitchen counter reveals usable preparation space. These effects provide visual context without claiming that the room can accommodate more than its actual dimensions allow.
Balanced Light Improves Visual Comfort
A single bright source can produce glare near the fixture and deep shadows elsewhere. In contrast, several well-positioned sources can distribute light more evenly across the room.
Balanced illumination allows the eye to move between bright and shaded areas without abrupt adjustment. Consequently, hallways, corners, and adjoining rooms may feel more connected. The arrangement should still include gentle variation because completely uniform brightness can appear flat or clinical.
Light Reveals Genuine Features
Focused illumination can draw attention to a fireplace, textured wall, built-in shelving, artwork, ceiling detail, or attractive flooring. However, the chosen feature should remain part of the actual property or its truthful presentation.
Light should not conceal cracks, moisture, damage, poor ventilation, or other material concerns. Likewise, fixtures and lamps should never block windows, controls, vents, electrical panels, safety devices, or exits. Presentation should clarify the home rather than distract from its condition.
Lighting Affects Colour and Cleanliness
Paint, timber, stone, fabric, metal, and flooring can look different under daylight, warm bulbs, or cool bulbs. Coordinated light helps buyers see these finishes more consistently as they move between rooms.
Bright light also reveals dust, marks, streaks, and worn surfaces. Therefore, cleaning must accompany lighting preparation. Increasing brightness without cleaning fixtures, windows, mirrors, and reflective finishes may draw attention to issues that dim illumination previously concealed.
How Should Existing Light Be Assessed?
A room-by-room assessment identifies where light enters, where it stops, and how existing fixtures perform. Checking the property under several conditions produces a more reliable picture than reviewing it once.
Observe Daylight at Different Times
Window size and direction affect when a room receives daylight. External overhangs, balconies, trees, neighbouring buildings, and deep window recesses may also block or filter incoming light.
Inspect each room during the morning, afternoon, and expected viewing period where possible. Seasonal and weather changes matter because a bright summer room may appear much darker during a cloudy winter afternoon. Record which corners lose definition and which finishes create glare under direct sun.
Review Window Treatments and Glazing
Heavy curtains, partially raised blinds, dark screens, and furniture near windows can reduce incoming light. Dirty glass, frames, and screens may further weaken clarity.
Check whether curtains can open beyond the glazed area and whether blinds operate smoothly. In addition, examine privacy requirements before removing or replacing any covering. Street-level rooms, bedrooms, and closely overlooked properties may require light-filtering treatments rather than completely exposed windows.
Inspect Colours and Surface Finishes
Dark walls, floors, cabinetry, furniture, and textiles absorb more visible light than pale reflective surfaces. However, dark finishes can still provide useful depth when the room contains adequate illumination and balanced contrast.
List the dominant colours and materials in each space. Then identify which elements can change safely and affordably. Repainting may not suit a rental property, while lighter bedding, an adjusted rug, or repositioned furniture may improve the balance without permanent alteration.
Test Every Existing Fixture
Turn on each ceiling light, wall fixture, lamp, vanity light, and under-cabinet source. Note failed bulbs, flickering fixtures, mismatched colour, dirty shades, damaged cords, and inadequate coverage.
The assessment should identify:
- Dark corners and unlit vertical surfaces
- Harsh pools of overhead light
- Glare on screens, glass, and polished finishes
- Work areas that lack task lighting
- Stairways and hallways with weak illumination
- Lamps that obstruct walking routes
- Fixtures using incompatible bulbs
- Connected rooms with visibly different light colours
Stop using any fixture that appears damaged, unstable, or unsafe.
How Can Natural Light Be Used More Effectively?
Natural light can reveal colour, texture, and connections with outdoor space. Staging should maximize the daylight genuinely available without exaggerating window size, exposure, brightness, or exterior views.
Clean Windows and Glass Doors
Clean glazing allows light to enter without visible haze, dust, or fingerprints. Wipe accessible interior glass, frames, tracks, sills, handles, and screens. Exterior cleaning should proceed only where safe access and property arrangements permit it.
Mirrors and glass doors also require attention because marks become prominent under brighter conditions. Nevertheless, cleaning cannot correct failed seals, damaged frames, or other defects. Those concerns require appropriate assessment rather than cosmetic concealment.
Open Curtains and Blinds Fully
Curtains should stack beside the window instead of covering part of the glass where the wall and existing fittings allow. Extending a curtain rod beyond the frame may help, although owners and tenants should consider permission requirements before changing hardware.
Raise blinds evenly and repair damaged operating mechanisms where authorized. However, preserve privacy and glare control. A light-filtering covering may provide a better balance than removing every window treatment, especially in ground-floor rooms or homes facing nearby residences.
Clear the Area Around Windows
Tall bookcases, high-backed chairs, large plants, and decorative objects can block daylight or cast broad shadows. Move substantial items away from windows while maintaining safe circulation and practical room use.
Crowded windowsills also interrupt sightlines. Retain only objects that do not materially obstruct the glazed area or outdoor view. An uncluttered opening often helps the room feel calmer while allowing the eye to travel beyond its physical boundaries.
Manage Exterior Obstructions Responsibly
Vegetation may reduce daylight when branches press against glazing or cover much of the opening. Trim plants only where ownership, tenancy, condominium, and local requirements permit it.
Preserve healthy landscaping, privacy, habitat, and the property’s exterior character. Permanent structures, neighbouring buildings, and balcony overhangs may remain beyond the resident’s control. In those cases, improve interior light distribution rather than attempting to disguise the actual exposure.
How Do Ambient, Task, and Accent Lighting Work Together?
Layered lighting combines several types of illumination. Each layer performs a distinct function, and their interaction often creates a more balanced result than one powerful source.
Ambient Lighting Provides General Illumination
Ambient lighting establishes the room’s overall brightness. Ceiling fixtures, recessed lights, suitable wall fixtures, floor lamps, and other broad sources may provide this layer.
The correct arrangement depends on room size, ceiling height, surface colour, shade design, and available daylight. A central fixture may work adequately in a small entrance but leave a large living room uneven. Supplementary sources can soften shadows and reveal corners without making the entire space excessively bright.
Task Lighting Supports Specific Activities
Task lighting directs illumination towards areas used for reading, cooking, grooming, studying, or other focused activities. Examples include bedside lamps, desk lamps, vanity lights, reading lamps, and under-cabinet lighting.
This layer helps communicate how a room functions. It can also reduce dependence on very bright ambient lighting. Position each source so it illuminates the intended surface without shining into someone’s eyes, reflecting strongly from a screen, or creating unsafe cables across a route.
Accent Lighting Draws Attention
Accent lighting emphasizes a selected focal point, such as artwork, shelving, a fireplace, or an architectural surface. It may also illuminate a distant corner and encourage the eye to travel farther into the room.
Use this layer selectively. Highlighting several unrelated objects can fragment the composition and create competing bright spots. Moreover, accent light should reveal a real feature rather than distract viewers from condition concerns or permanent limitations.
Layering Creates Flexibility
Different viewing times require different combinations. Daylight may provide most ambient illumination during the afternoon, while lamps and ceiling fixtures become more important after sunset.
Dimmers can support flexibility when existing equipment permits safe operation. However, not every bulb or fixture works with every dimmer. Any new installation, rewiring, or compatibility concern requires appropriately qualified attention rather than experimentation.
How Should Brightness Be Distributed?
Effective distribution reveals the whole room while preserving comfortable contrast. Neither dimness nor excessive brightness supports a natural residential presentation.
Match Output to the Room
Bulb output should suit the fixture, room dimensions, surfaces, and intended task. Dark finishes and high ceilings may require different arrangements from pale finishes and compact rooms.
Avoid prescribing one brightness level for every residence. Shade opacity, fixture height, wall colour, window exposure, and furniture placement all influence the result. Test the actual room rather than relying solely on packaging descriptions or assumptions based on another property.
Illuminate Corners and Vertical Surfaces
A room can appear smaller when its perimeter disappears into darkness. A floor lamp, table lamp, or suitable wall source may bring definition to a neglected corner.
Lighting a wall can also make artwork, shelving, or texture more visible. Nevertheless, do not crowd every corner with a lamp. One carefully positioned source may solve the problem while preserving floor area and uncluttered sightlines.
Balance Connected Rooms
Open doorways reveal differences in brightness. If one room glows intensely while the next appears dark, the transition can feel abrupt and may weaken visual continuity.
Use compatible light levels and colours across visible spaces. Hallways should provide enough illumination to connect rooms safely, while kitchens and task areas can remain somewhat brighter. Balanced does not mean identical; it means that changes feel deliberate rather than accidental.
Consider Shades and Fixture Direction
A translucent shade spreads light differently from an opaque shade. Downward-facing fixtures emphasize surfaces below, while upward light may soften ceiling and wall transitions.
Check what each fixture actually illuminates. A decorative lamp may look attractive yet provide little useful light, while an exposed bulb may create uncomfortable glare. The shade, placement, and direction matter as much as the bulb itself.
How Does Colour Temperature Affect Presentation?
Colour temperature describes whether white light appears warmer, more neutral, or cooler. It influences atmosphere and changes how interior colours look, especially when several light sources remain visible together.
Warm Light Can Create Comfort
Warm light often supports bedrooms, living rooms, and dining areas because it can create a softer residential atmosphere. It may complement timber, cream, beige, and other warm finishes.
However, excessively warm illumination can make pale walls look yellow or cause some materials to appear dull. Test the room after sunset and compare the result with daylight photographs. The goal is warmth with reasonable colour accuracy, not an amber cast across every surface.
Neutral Light Can Support Clarity
Neutral light can suit kitchens, bathrooms, work areas, and connecting spaces when it shows surfaces clearly without appearing strongly blue or yellow.
Its suitability still depends on finishes and adjacent rooms. A neutral kitchen beside a very warm dining area may show an obvious shift through an open doorway. Therefore, evaluate colour relationships across the viewing route rather than choosing bulbs one fixture at a time.
Cool Light Requires Careful Use
Cooler light may appear crisp, but excessive coolness can create a clinical atmosphere in residential rooms. It can also make warm paint, timber, and fabric look grey or disconnected.
That does not make cool light universally unsuitable. Some spaces and finishes may respond well to it. Testing remains essential because daylight, surface colour, and fixture diffusion influence how the light appears in practice.
Consistency Supports Accurate Colour
Mismatched bulbs may cause one side of a room to appear yellow while another looks blue. This difference becomes especially noticeable in photographs and open-plan interiors.
Replace failed or inconsistent bulbs with compatible alternatives where safe and permitted. Before photography, test every visible fixture together. Accurate colour helps viewers assess paint, cabinetry, flooring, textiles, and permanent finishes more reliably.
How Does Fixture Placement Affect Visual Balance?
Fixture placement determines where shadows fall, what receives attention, and whether lamps interfere with movement. Effective positioning supports the room’s function without overcrowding it.
Place Ceiling and Pendant Fixtures Carefully
Existing ceiling fixtures provide broad illumination, although their height and shade design affect coverage. Pendants can define a dining table or island, but they should not block important sightlines.
Clean visible fittings before viewings. If a shade appears damaged or unstable, address the concern appropriately. Do not modify wiring, ceiling boxes, or fixture connections without suitable authority and skill.
Use Floor and Table Lamps Purposefully
A floor lamp may brighten a corner, support reading, or balance a living room. A table lamp can create lower-level illumination and soften reliance on overhead light.
Place lamps on stable surfaces and keep them away from combustible materials, water, and areas where children or pets could pull them over. Cords should follow walls or protected routes without crossing walkways. Avoid adding multiple lamps simply to fill empty surfaces.
Consider Wall, Picture, and Storage Lighting
Existing wall lights can illuminate narrow rooms and vertical surfaces without consuming floor area. Picture lights may emphasize artwork, while safe storage lighting can reveal wardrobe or cabinet capacity.
Every source should serve a clear purpose. Excessive decorative lighting may distract viewers and create a theatrical effect. Furthermore, built-in lighting should operate correctly because failed strips or inconsistent sections can draw attention to maintenance needs.
How Can Mirrors and Reflective Surfaces Help?
Mirrors and reflective finishes redirect existing light rather than create it. Strategic placement may improve distribution, but excessive reflection can produce glare and visual confusion.
Reflect Useful Light and Orderly Views
A mirror opposite or beside a window may carry daylight deeper into a room. Before positioning it, check the reflection from the doorway, likely camera angle, and primary seating areas.
The reflected view should appear attractive and orderly. A mirror that duplicates clutter, a blank corridor, exposed storage, or a bright bare bulb may weaken presentation. Adjust the position until it supports the room’s focal point.
Choose a Suitable Scale
A very small mirror may act as decoration without affecting light distribution meaningfully. A larger mirror can reflect more of the room, but it should remain proportionate to the wall and nearby furniture.
Mirrors do not change physical dimensions. They influence perception by repeating light and visual depth. Keep this effect realistic, especially in photographs, where reflections can make layouts harder to interpret.
Use Reflective Details Sparingly
Polished taps, glass, subtle metallic accents, glossy tiles, and reflective cabinetry can contribute brightness. However, covering numerous surfaces with shine may create glare and an impersonal atmosphere.
Balance reflective finishes with matte textures, timber, and soft textiles. Clean every shiny surface before photography and viewings because fingerprints, dust, and streaks become more visible under directed light.
How Should Lighting Vary by Property Type?
Property form, window exposure, ceiling height, occupancy, and viewing schedule influence lighting choices. A single arrangement cannot suit every Canadian residence.
Condominiums and Compact Urban Homes
Condominiums may have windows on only one side, causing daylight to weaken towards internal areas. Keep sightlines open from the glazing and use layered artificial light deeper inside the unit.
Floor lamps should have narrow, stable footprints and secure cable routes. Moreover, coordinate kitchen, dining, and living illumination where these functions share one space. Avoid large shades that obstruct views or visually lower the ceiling.
Detached Houses and Townhouses
Detached houses may receive daylight from several directions, although each room can behave differently throughout the day. Townhouses often contain internal zones, stairways, and landings with limited glazing.
Assess every level separately while maintaining continuity along the principal route. Exterior entrances, steps, porches, and side doors also require safe illumination. Meanwhile, unused rooms need enough light to communicate function without appearing artificially staged.
Older Properties and New Builds
Older properties may contain fewer outlets, lower-output fixtures, or architectural features that create shadows. Preserve character while addressing safety and visibility realistically.
New builds may include extensive recessed or integrated lighting, but quantity alone does not ensure balance. Check colour consistency, glare, and failed sections. In both cases, permanent electrical changes require appropriate approval and qualified assistance.
Vacant and Occupied Homes
Vacant properties lack lamps that would ordinarily soften overhead lighting. Existing fixed fixtures may need support from safely placed temporary lamps, provided access and security arrangements permit them.
Occupied homes can reuse suitable lamps already available. However, daily routines, mobility devices, children, pets, and furniture placement affect safe positioning. The arrangement should remain practical throughout the listing period.
Seasonal and Local Conditions
Short winter days and cloudy conditions can increase reliance on artificial illumination, particularly for evening appointments, basement rooms, and units shaded by nearby buildings. Energy-conscious preparation involves using only helpful sources and switching them off when the property no longer requires illumination.
Planning home staging in Toronto may involve condominium layouts, deep urban floor plans, basement spaces, snow-reflected daylight, and early winter sunsets. These factors support testing the home at realistic viewing times while following applicable tenancy, condominium, electrical, property, and safety requirements.
How Should Individual Rooms Be Lit?
Each room needs lighting suited to its purpose, surfaces, dimensions, and natural exposure. Consistency matters, but identical treatment can ignore important functional differences.
Entrance and Hallway
The entrance should provide safe, welcoming visibility from the threshold. Clean the fixture, confirm bulb operation, and remove objects that cast unnecessary shadows or obstruct the door.
Hallways need enough light to reveal their full length and any changes in floor level. A source near the far end may draw the eye through the passage. Coordinate the colour with adjoining rooms so the transition feels intentional.
Living Room
Combine ambient lighting with lower-level lamps near conversation or reading areas. Then assess whether a distant wall, fireplace, artwork, or corner needs restrained accent light.
Keep screen glare under control by adjusting lamp direction rather than dimming the entire room. Mirrors and glass tables require similar checks. Finally, ensure that lamp stands and cables do not narrow walking routes or create hazards.
Kitchen
Kitchen lighting should reveal worktops, cabinetry, flooring, and appliances accurately. Clean fixtures and reflective finishes because residue becomes obvious under task lighting.
Existing under-cabinet lights may reduce countertop shadows, while pendants can define an island. However, avoid mixing visibly different bulb colours. Keep ventilation, outlets, cooktops, and appliance clearances free from decorative lamps or staging objects.
Dining Area
Light should define the dining surface without creating a harsh spotlight. A proportionate pendant or ceiling fixture may provide focus, while nearby ambient light prevents the surrounding room from disappearing into shadow.
Check glare from polished tables and glass. Warm or neutral illumination often supports a comfortable atmosphere, but the correct choice depends on nearby finishes and connected spaces. Keep centrepieces low enough to preserve sightlines.
Bedrooms
Bedrooms benefit from calm ambient light and practical bedside illumination. Open window treatments where privacy permits, and keep lamps proportionate to the tables and bed.
Check wardrobe visibility without leaving every storage light operating unnecessarily. Coordinate bulb colour across visible fixtures and avoid a single bare source that produces severe shadows. Secure cords and unstable lamps where children or pets may enter.
Bathrooms
Vanity lighting should illuminate faces evenly and limit harsh shadows. Clean mirrors, glass, taps, tiles, and fixtures before increasing brightness because reflective surfaces reveal marks quickly.
Use only fittings suitable for the location and existing installation. Keep lamps and extension leads away from water. Damaged fixtures, uncertain wiring, or moisture-related concerns require qualified assessment rather than cosmetic adjustment.
Basements
Basements often receive limited daylight and may have low ceilings. Distribute light across activity areas, walls, corners, stairs, and circulation routes instead of depending on one intense central source.
Keep window wells clean and unobstructed where safe. Do not conceal ducts, panels, detectors, heating equipment, moisture concerns, or exits. Realistic brightness should clarify the basement’s actual condition and use.
Home Offices and Multipurpose Rooms
A desk needs focused task light without strong reflection on the screen. Ambient illumination should also show the room’s boundaries and any secondary function.
If the room supports several activities, light one coherent arrangement for photographs rather than displaying every possible use simultaneously. Keep cables organized and avoid adding floor lamps where they interfere with chairs, doors, or storage access.
Outdoor and Transitional Areas
Porches, balconies, pathways, steps, patios, and exterior doors require safe, functional illumination. Clean existing fixtures and remove objects that cast confusing shadows across walking surfaces.
Exterior light should show access and condition without creating glare for neighbours or interior rooms. Follow property, tenancy, condominium, and local requirements. Lighting cannot compensate for damaged steps, loose railings, ice, or other hazards.
How Does Lighting Affect Listing Photography?
Photography records light differently from human vision. Careful preparation can improve clarity, yet editing and exposure must preserve realistic colour, brightness, views, and property condition.
Balance Daylight and Artificial Sources
Open appropriate curtains and use artificial lights where they support even coverage. However, activating every fixture may introduce mixed colours, reflections, or bright hotspots.
Harsh sunlight can make windows appear excessively bright while leaving interiors dark. Adjusting the photography time or filtering direct light may create better balance. The final result should still represent the property’s normal exposure honestly.
Control Glare and Reflections
Mirrors, polished floors, glossy cabinets, screens, glass tables, and stainless finishes can reflect bulbs, equipment, or unrelated objects. Check every likely camera position before photography begins.
Changing a lamp’s angle or switching off one problematic fixture may solve the issue. Clean reflective surfaces thoroughly, and avoid placing accessories solely to cover unwanted reflections or defects.
Maintain Colour Consistency
Different bulb colours can create visible patches across walls and ceilings. Cameras may emphasize these differences, particularly in connected rooms.
Test all lights together before the photography session. Any correction after capture should restore plausible colour rather than transform finishes. Editing must not create daylight that the windows cannot provide or hide the property’s natural lighting limitations.
How Should Lighting Be Prepared for Viewings?
Viewings require safe movement, visual comfort, and realistic living conditions. Lighting should support the route through the property without producing a staged theatrical effect.
Prepare Before Visitors Arrive
Check every required bulb and turn on useful lights in advance. This allows the property to reach a stable presentation and removes the need for visitors to search for switches.
Adjust curtains according to daylight, weather, privacy, and glare. Illuminate entrances, stairs, hallways, and changes in floor level carefully. Meanwhile, avoid excessive brightness in small rooms, which can create discomfort and emphasize glare.
Adapt to the Viewing Time
A daytime viewing may rely heavily on natural light, while a winter afternoon or evening appointment needs more artificial support. Cloud cover can also change conditions quickly.
Walk through the home at the scheduled time and examine each doorway. Balance connected rooms, reduce screen glare, and check exterior approaches. After the viewing, restore secure window coverings, exterior settings, and energy-conscious lighting arrangements.
Which Low-Cost Changes May Improve Lighting?
Affordable preparation should begin with maintenance, cleaning, daylight access, and the strategic use of items already available. New purchases should address a clear problem.
Prioritize Simple Adjustments
Useful low-cost actions include:
- Replace burnt-out bulbs with compatible alternatives.
- Match bulb colour within connected areas.
- Clean shades, fixtures, windows, and mirrors.
- Open curtains and blinds as far as appropriate.
- Move tall furniture away from glazing.
- Reposition existing lamps towards dark corners.
- Remove heavy shades that unnecessarily restrict useful light.
- Reduce objects that cast cluttered shadows.
- Check entrance and exterior access lights.
- Test the arrangement during daylight and after sunset.
Switch off power where appropriate before basic permitted maintenance, and allow hot bulbs to cool fully.
Which Lighting Mistakes Weaken Presentation?
Common errors include uneven coverage, conflicting colour, glare, blocked daylight, and unsafe lamp placement. Most require careful editing rather than additional fixtures.
Avoid Overlighting and Underlighting
One bright ceiling light can leave the room’s edges dark, while numerous powerful sources can make a small room uncomfortable. Use layered illumination and remove unnecessary fixtures from the arrangement.
A failed bulb should not remain visible. However, replacing it requires the correct compatible type and safe access. Stop if the fitting shows damage, heat, flickering, or unusual operation.
Correct Glare and Mixed Colour
Reposition lamps that reflect strongly in mirrors, screens, artwork, or polished finishes. Shades and indirect light may reduce glare without making the room dim.
Replace mismatched bulbs within visible connected spaces where suitable. Test paint, flooring, and fabric under the final arrangement because colour temperature can alter their appearance substantially.
Protect Accuracy and Safety
Do not use lighting or image editing to hide moisture, damage, poor ventilation, missing fixtures, or permanent darkness. Photographs should represent plausible conditions.
Keep cables away from routes and lamps away from water or combustible materials. Never overload outlets, conceal damaged wiring, or attempt regulated electrical work without appropriate authority and qualified assistance.
What Electrical and Household Safety Measures Matter?
Lighting preparation must remain within the resident’s abilities, permissions, and property rules. Cosmetic goals never justify electrical risk.
Use Fixtures and Bulbs Safely
Follow compatibility requirements for every bulb, fixture, shade, and control. Switch off power before permitted basic maintenance, use stable access equipment, and let hot bulbs cool.
Avoid overloaded outlets and extension leads. Keep cords visible enough to inspect but protected from walking routes, doors, furniture pressure, children, and pets. Do not run cables beneath unstable rugs or through wet areas.
Recognize When Qualified Attention Is Necessary
Damaged wires, loose fittings, flickering circuits, overheating, burning smells, moisture exposure, or uncertain compatibility require appropriate investigation. Do not continue using the affected equipment.
Permanent installation, rewiring, circuit changes, or replacement of hard-wired fixtures may require qualified assistance and formal permission. Tenants and condominium occupants should also follow applicable ownership, building, and access requirements.
What Should the Final Lighting Check Include?
A final inspection should test the home during both daylight and evening conditions. Review it from entrances, likely camera positions, and the normal viewing route.
Complete a Room-by-Room Review
Confirm that:
- Windows and coverings operate correctly
- Glass, shades, and fixtures appear clean
- Every required bulb works
- Connected rooms show consistent colour
- Corners and vertical surfaces remain visible
- Mirrors reflect orderly views
- Screens and polished materials avoid glare
- Cables remain secure and unobtrusive
- Pathways, stairs, doors, and exits stay clear
- Exterior entrances provide safe visibility
- Daytime and evening arrangements feel natural
- Photographs show realistic brightness
- Safety devices, panels, and vents remain accessible
- No lighting conceals defects or limitations
Remove temporary equipment after completing the inspection.
Conclusion
Balanced lighting can improve a staged property by clarifying dimensions, supporting accurate colour, revealing genuine features, and creating comfortable connections between rooms. Natural daylight, ambient illumination, task lighting, and restrained accent light work best when their brightness, direction, and colour remain coordinated. Clean fixtures, thoughtful placement, open windows, and realistic photography can strengthen presentation without changing the property itself. However, safe operation, truthful representation, energy-conscious use, and respect for permanent limitations must remain central to every lighting decision.
FAQs
Why does lighting matter when staging a property?
Lighting matters because it reveals room boundaries, colours, surfaces, circulation routes, and architectural details. Balanced illumination may also reduce deep shadows and create smoother transitions between adjoining rooms. However, light changes visual perception only; it cannot enlarge rooms, repair defects, or guarantee a particular response from prospective buyers.
Should every light remain on during a property viewing?
No, every light does not need to remain on during a viewing. Use fixtures that improve visibility, safety, balance, and room definition. Switching on unnecessary sources may create glare, mixed colour, or excessive brightness. Test the arrangement at the scheduled time and adjust it for daylight and weather.
What colour temperature works well in a staged home?
Warm or neutral light often works well in residential staging, although finishes, daylight, fixture design, and room function affect the choice. Maintain reasonable consistency across connected spaces. Test bulbs after sunset and before photography because overly cool light may feel clinical, while very warm light can distort colours.
How can lighting make a dark room appear more inviting?
Layer ambient, task, and accent sources to illuminate the room’s centre, activity areas, vertical surfaces, and corners. Open suitable window coverings, clean the glazing, and reposition furniture that blocks daylight. Use a mirror where it reflects useful light, but avoid harsh bulbs, excessive glare, or unrealistic photographic brightening.
Is natural light better than artificial light for staging?
Neither source is universally better because they perform complementary roles. Natural light reveals connections with windows and outdoor views, while artificial illumination supports dark areas and evening viewings. The strongest arrangement usually balances both sources according to orientation, season, weather, room function, privacy, and the scheduled presentation time.
How should lighting differ between kitchens and bedrooms?
Kitchens generally need clear ambient and task lighting across worktops, sinks, appliances, and storage. Bedrooms usually benefit from softer general illumination and practical bedside lamps. Both rooms require consistent colour, safe fixture use, and accurate surface representation, but their differing activities justify different brightness and distribution choices.
Can mirrors improve lighting in a staged property?
Yes, mirrors can redirect daylight or lamp light when placed opposite or beside a useful source. They should reflect an orderly view rather than clutter, exposed equipment, or glare. Choose a proportionate size, clean the surface, secure it correctly, and remember that reflection does not physically enlarge the room.
What lighting mistakes should sellers avoid?
Sellers should avoid relying on one harsh overhead light, mixing incompatible bulb colours, blocking windows, ignoring dark hallways, and creating glare on reflective surfaces. They should also prevent unsafe cords, overloaded outlets, damaged fittings, and excessive brightness. Lighting and image editing must never conceal defects or permanent limitations.
How should a home be lit for listing photographs?
Balance available daylight with selected artificial sources so rooms appear clear without looking unnaturally bright. Open appropriate coverings, clean reflective surfaces, control glare, and match bulb colours across connected areas. Check dark corners and window exposure carefully, then keep image correction realistic so colours, views, fixtures, and condition remain accurate.
Which low-cost lighting changes can improve presentation?
Low-cost improvements include replacing compatible failed bulbs, cleaning shades and fixtures, opening window coverings, moving furniture away from glazing, and repositioning existing lamps. Matching bulb colour, cleaning mirrors, reducing clutter, and illuminating neglected corners may also help. Always use cool bulbs, protect cables, and follow fixture safety requirements.